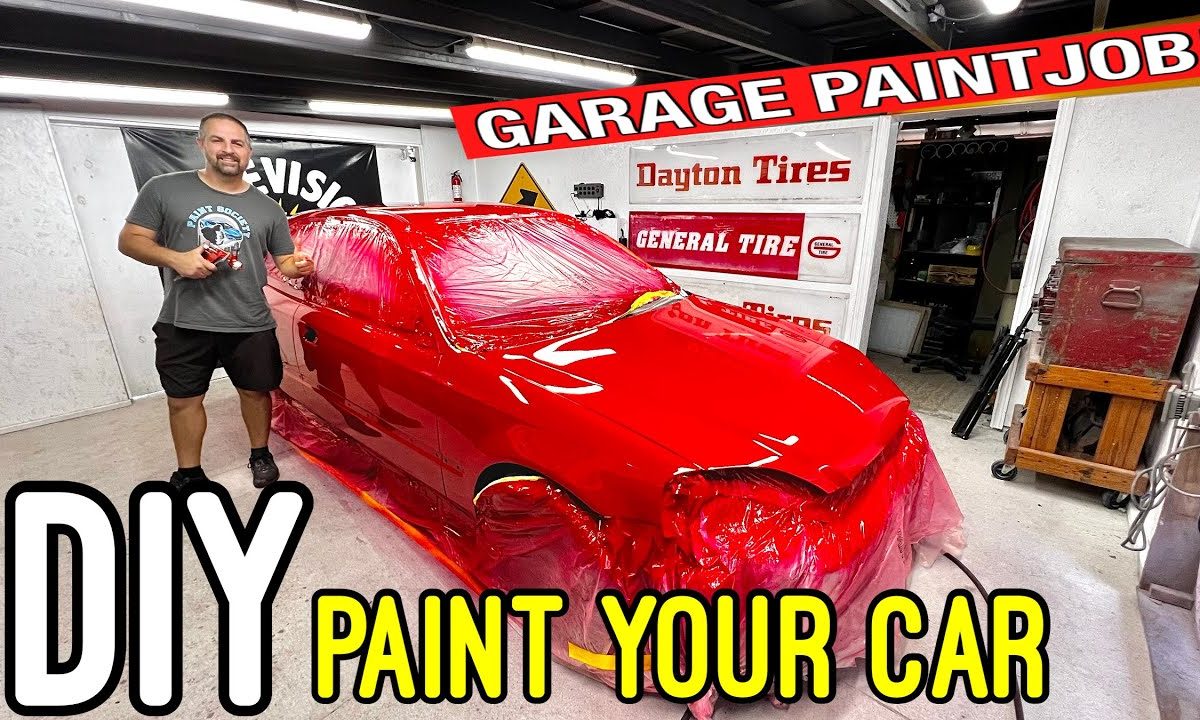
in this episode, we’re gon na go over the complete paint job guide, how to paint your car without a paint booth, probably just in your own home garage Or your shed we’re gon na go over all the procedures, everything you’re going to need to know to get a clean job, starting with how to get it all sanded how to get it all cleaned up. Some of the things that you need to know to prepare the area and which you’re painting in to get the cleanest possible paint job then also we’ll go over different techniques for spring. We’ll talk about how we’re going to mask off the car, we’ll even get into detail about the paint we’re using and how to apply that paint as far as base coat and clear coat is concerned, so that you can optimize your finish in your own home garage And we’ll show you the results in the end, I think you guys can enjoy this one. So, as you guys are getting your project ready for the final sanding, here’s some things you need to know. First off the vehicle here is a Civic hatchback and while we’re working on it with body Vision, what’s up guys – and this is actually the boosted boys car so we’ll be taking you through some of the steps that we’re gon na do to get this prepared.
Now it is not 100 needed, but we are going to be using the dust extraction system and there’s a few different dust extraction systems on the market that you can use and the reason why we’re using it is because we’re going to be painting in the same Exact garage, so any chance we get to limit the amount of dust and put it in here and not in the air is greatly going to help us out. But if you don’t want to spend the money on Dust extraction, that’s perfectly fine. What you can do, instead is just using water sanding as a method to help you really keep that dust down, and you can just clean it out when you’re done and we’re ready to get the car sanded. Now we’re going to be using a P400 grit. That is papers by Kovacs.
It’S super attack disc, it’s a Max film and this actual paper has the holes in it now I’ll link everything in the description. So if you don’t have a sander with dust extraction, you can get the Sandpaper that doesn’t have the holes in it. Now we’re also going to be using an interface pad and an interface pad matches up with the actual sandpaper, and it gives a little bit of a cushion. So, while we’re sanding, we can go around the different Contours of different areas that might need it and then basically, that pad will just match up with these holes over here and then you have your true dust extraction and for the final sand, we’re going to be Using a dry guide coat now you can get this in a dry guide coat, which is like a powder or you can get this in a spray form, and basically all we’re going to do is kind of run it over our primer areas and once we remove This with a sander, then we know that this area is good for paint. Now, if you’re running a solid color, then you can sand it up to 600 grit.
If you are not sealing a sealer is just a thinned out primer. That’S all it is that doesn’t get sanded, but if you’re in your home garage and you’re not really familiar with painting a whole lot – and this is your first project – I would suggest not sealing it and just stand it up to 600. If it’s a solid and if it’s a metallic sand it up to 800 We are going to be sealing so we’re going to be sanding this down with 400. Let’S go ahead and get this whole thing sanded down. I can adapt much closer to paint.
Well, we just finished standing in the car and we used seven pieces of paper now. If you used a 320, which you could still get away with, you might use less, but all that matters really is that the paper does the job, and once it’s done, you change it out, don’t keep on using the same paper or else. Basically, it’s pretty much worthless and, as we pull the top off the dust extractor, you can see all the dust that would have been in the shop.
You can see it’s kind of red and gray, and all of that would have been on the actual tables. Maybe within the car itself, so you know not 100 need it, but over time it will pay for itself. So let’s say you don’t have the money for dust extraction or you really never plan on painting again, you can use a block and water and what that will do is instead of there being dust all over the place the water is going to contain it. Now I’m like a little bit messy on the ground, so you’re going to have to pretty much wash everything out, but this is a good way of doing a mile sand and keeping the dust well on the ground and not in the air and basically all you’ll. Do is put a little bit of water, it doesn’t need to be ocean just a little bit of water and what the water does.
Is it lubricates the Sandpaper, and it also helps Clump up the dust and bring it down to the ground. So then, basically, all you got to do is rinse it off. Now you can use a squirt bottle as well, or you can use a sponge and hold the sponge full of water right next to you and just squeeze a little bit or you can even have a bucket on the ground, there’s no right or wrong way to Do it just as long as you’re getting the water on the panel and the Sandpaper is then lubricated now one thing you will find is that if you are using water, your sandpaper will last a little bit longer because it will not get clogged up as much So this is definitely an option you can consider. Foreign thing you do want to remember, though, is if you’re using a 400 by hand on a block. Well, it’s going to be much different than if you were using it on the interface like we did just previously.
That’S because when you’re using it by hand, well you wouldn’t think it so, but it’s more aggressive of a scratch, because you have that direct contact with the surface. So I don’t want you guys to really dig into it. I just kind of want you guys to Glide over the surface and knock it down and make it smooth if you’re concerned, with going too aggressive, if you’re using 400 with the machine sander and the interface pad. Well, maybe you’ll use 600 by hand, and then you can always step it down, but surely you can do both ways and have the same exact result and just watch it down. Well now the car is completely sanded down.
Let’S hit up those little edges that the center just couldn’t get to for that we’re going to be using a k600 grit. Now it is a grit higher remember what we said about hand sanding. You always want to try to step it up a little bit just because you don’t want to be too aggressive with it and we’re using a hand pad, and that will help really conform to those edges. And now what we can do is we can get into all those edges. Now, there’s different ways that you can do this: you can use a scuff Pad, but I prefer using this little hand pad because it’s just easier to use and the paper really doesn’t clog up too much.
So it’s good to get all these edges because you don’t want any peeling on the paint job itself and remember the sander just really didn’t get into this area. So we’re going to go ahead and get this area because everywhere needs to be completely sanded and don’t forget about the door handles inside the Gap here. This will be the first place for any type of paint to peel when there’s contact with two surfaces together now you’re not going to sand inside of the door jamb, because we’re going to put tape right up to the edge and we’ll show you that later. Also in the edges Adam’s going to go ahead and hit up any of those areas that once again at the center just did not get to, and you can see that the actual sand, sanding will kind of powder up the primer and you want it. Nice and smooth a lot of guys think that you can put down primer and paint right over it.
Nope you got to wait at least 24 hours to sand it nice and smooth another area right around the window. Edge is very important because these are going to be common areas that are going to peel off at this point, we’re ready to wash the vehicle off and get it ready for its tape job, so the whole vehicle is completely sanded down. Now it’s time to prepare your vehicle for masking and paint and prepare your environment for a paint job. Now that we have the car pulled out, we’re going to blow all of our dust and contaminants through the fans and out that way we can get it out of here quicker [ Applause ] now this is probably more important than anything is getting your environment clean. Why Rush on something that can really affect your paint job?
So if you think you’ve blown enough go ahead and blow it one more time and clean off all the counters, because any dust that is on your walls, your ground, is feeling it’s going to be in your paint. Job too, and we’re gon na go ahead and get this thing all washed up. Now we’re going to be using some purple Power and a maroon scuff pad by washing the car. It’S really going to pull out all of the powder and all the dust out of the scratches that way, it’s completely illuminated from the car not just sitting on top and we’re not smearing it or wiping it all over. So basically, we’ll just give it a nice good spray down and then we’ll wet it up and we’ll get this whole car completely clean.
we’re back here the next morning. Now there are a few things that you can do that are very simple: to put yourself in a driver’s seat for a better paint job and well that has to do with. When are you going to do your paint job if you plan on doing it at night?
Well, that’s when the bugs come out and well sometimes they can land right in your spray job, but I would recommend morning hours between 8 and 11 That’S when it’s a little bit more cooler, there’s less humidity and that’s exactly what we’re doing here. It’S around eight o’clock when we start to wipe down the car and get spraying, and it’s just as simple as things for you guys in your home garage that will make the biggest difference we’re now ready to clean off the car. Now I prefer to use the Sprayway glass cleaner, it’s very cheap and it’s going to leave a streakless finish gon na make sure that it removes any contaminations from oils from your fingers or anything like that. So there’s two different types of cleaners: we’re going to start off with this and a microfiber towel. I like the microfiber, because it really picks up everything from the surface and it doesn’t leave any lint now you might not think of it, but it is very important that when you go to wipe off the cleaner from the panel, you want to do your best Job of just wiping it in one pass, you don’t want to go all over because that’s going to really just mess with the contaminants and smear them, but we want to do our best job of just wiping it off.
And it’s the simple things just like this: that really make the biggest difference when it comes down to fish eyes or any sort of contamination, just wiping in One Direction, we’ll hit up the roof and the cool thing about this Sprayway glass: cleaner. Is it Foams up and you’ll be able to tell that if there’s an issue of concern it will kind of puddle around that area? So you might want to go over it one or two times, but for the majority, since we did spray this car with the Greaser and you kind of get the progression here. We’Ve been cleaning it ever since we were done with the sanding and the clean, clean clean is the name of the game in order to get that beautiful paint job. So if you have an area like, I was saying that kind of Puddles up you just go back over it and make sure that it’s all good to go all right, all right, just finishing up on the last panel now I do prefer to do the Sprayway Glass, cleaner first because it takes a little bit longer to dry.
Now we’re going to be using a separate process to clean as well there’s two different types of cleaners: you’re going to need to use and well they have two different purposes. So let’s talk about that right now now, sometimes it might be a little bit confusing, but we’re going to clarify things real quick. So we use our Sprayway glass cleaner. Now they do two different things. This is going to remove contaminants from your fingers.
Let’S say you went out to lunch and you had greasy fried chicken or something like that, and you touch the surface of the vehicle. Well, basically, this is going to remove it and then let’s say that you were working on the car all the way up into this point with let’s say oils and greases that are automotive based. Well, this is a type of wax and grease remover. That’S going to remove it, this will not do it and this will not remove any type of fingerprints or anything like that. So it’s very important to use both and it’s more important to actually wear your gloves while you’re doing it and when you get down to the prep, all make sure you’re using a separate microfiber.
You don’t want to use the same exact one we use with the glass cleaner now, when you’re applying this wax and grease remover, you just don’t apply it and wipe it off. You apply it and you kind of flood it on and what that does. Is it floats all the contaminants up to the surface so give it a moment to do its job and once it floats all the contaminants up to the surface, we’re going to wipe in the same exact fashion across, and this will go ahead and remove the contaminants From the surface itself, so moving along to the side, if you don’t have a pump sprayer like this, it’s no big deal. You can take a rag full of the wax and grease remover, wipe it on first and then dry it. But if you’re considering getting into painting cars, it’s a cheap alternative and an easy way to get the cleaner onto the surface.
So once again we’ll let it sit for a few moments. Let it float all the contaminants to the surface and then we can go ahead and just wipe it off Now by this time there should be nothing, no residue on your rag since we’ve washed the car, since we’ve cleaned it with the original Sprayway glass, cleaner and Now the prep solvent you can see how clean the surface of this rag is, and that’s a good sign that we’re going to get a nice clean, contaminant, free paint, job and just getting around the car we’ll go ahead and finish up here in the front end. At those contaminants come to the surface and it’s always a good idea: let’s take a rag and kind of move it around a little bit trying to get maybe a dry spot on the rag to soak up as much as you can long strokes there. We go all right that wraps things up for the cleaning process, make sure that you go over it a couple times. You can never clean too much on a vehicle, that’s getting ready for paint.
So if you think it’s clean I’ll just go ahead and maybe do it one more time the car is all cleaned up now, it’s time for a sealer. Now the sealer we’re going to be using is a 2K sealer and it mixes up three to one to one and we’ll talk about that in just a moment. But what’s the reason why you need to use a sealer and what is a Sealer or do you need to use a sealer? Well, I told you earlier in the article: if you’re, if you’re new to painting, I would suggest just priming everything and then sanding it down. That’S going to be the cleanest and most efficient way for you if you’re new.
But if you are a seasoned painter and maybe paint a few cars in your garage a year, sealer is going to be the best possible way or process to do on a vehicle like this and here’s. The reason why, if you come and take a look at the vehicle, we have a multi-colored vehicle, we have primer, we have red, we have new fenders that are in Black. The hood is black, so putting down one nice even coat. What that does is it allows our base coat our red to cover it evenly? If we hadn’t put our sealer down on a car, that’s all multi-colored like this, then we would have to put about at least two or three more coats of Base.
It would never match it wouldn’t be perfect. Now. The reason why we’re putting sealer down over a OEM or aftermarket part is because it’s a primer, it’s a thinned out primer. It does not get sanded like again. If you don’t want to seal that.
Just Prime these in 2K and then sand them and pretty much the whole car will be gray. Let’S go ahead and mix the sealer up and apply it, and this is a sealer that we’re going to be using. That is many different types of sealer. This is a 2K sealer, two part. That means it has the sealer, and then it has the additives that make it Harden.
If you were just put the sealer on, it would never Harden and it doesn’t matter which goes in first, whether it’s the hardener or the reducer, because they both mix up to the next one and then the following one on the actual Cup itself. So we’ll take this next one up to the next number: five, since we’re using the series of fives and then we’re ready for our reducer, the reducer thins it out and if you’re having issues with it not spraying. Well, just add about 10 percent, more reducer. That will help smooth things out just a little bit, but right now you always want to start off with mixing it according to the technical data sheets and what it suggests. So that’s up to the next one, and we are good to go now right before you’re.
Going to go ahead and spray, your Sealer or any coating you’re going to need to get yourself a tack rack now these are automotive based tack Rags. Sometimes, if you try to get attack rag from let’s say, Walmart it’ll be for furniture and it’s very greasy and it’s not really compatible with automotive paint. But what you need to know, though, is when you get this tack rag, you just don’t put it right on the surface, you want to open it up. First, you got to let this gas out or air out first, because it is a little bit greasy now. This particular tack rag is a low tack, meaning that when you put it on the surface, it’s it’s not going to leave a residue, but when you actually go to use it, you can’t put it on too aggressively and we’ll show you that here in just a Moment but sometimes these will be a little bit difficult to get apart, but once you get it apart, just go ahead and air it out for a good 15 minutes or so, and that will help it when it goes to be used for the first time.
Something just like this will be fine and you can just hang it up, and after about 15 minutes, or so you can go ahead and get your tack Rag and I like to lightly Bunch it together. Something just like this and we’ll start to lightly tack. It off from the surface on the top surface and all the way to the sides. You never want to push down on it, because that could leave some sort of residue on there again. These are low tack, but you don’t want to leave any sort of residue on the surface itself now, if you want to take it one step further in your in your home garage or your booth, remember we’re giving me all the tips you’re going to need to Get a clean paint job.
I have a particle Control Spray by like 90 right here and basically before you spray it right before you, spray you’re, going to want to put it down, and we put it into this pump sprayer right here and basically what this is going to do is. This is going to coat wherever you’re spraying and it’s going to hold down the dust or any contaminants on the surface so that they don’t end up in your paint job. Now I like to be very liberal with this. That way, you don’t have to worry about. Recoding it or reapplying it.
You’D only have to do this really one time before the paint job. Of course, it’s never a bad idea to go ahead and reapply if you need, but this stuff really works well, we’ve been using it in our spray booth and even at home. It makes a huge difference in the surface, preparation and the contamination and holding down that dust just to make sure you can eliminate as much buffing as possible. But you guys need to be realistic. You’Re not going to have the most beautiful paint job coming out of a non-paint booth, but you can get very good results that can be buffed if you want to take it to that really show Quality Car Finish, but keep in mind that there’s going to be Some work you’re going to need to do like these tips and tricks we’re giving you these are things that you need to imply on your article to really make sure that you’re getting the best possible finish right now.
We have everything, nice and wet we’re good to go now, we’re going to be spraying our paint out of this dv1 by developers. Now this is the base coat gun, but it will still spray sealer. Just fine honestly, it will spray clear just as well as well. It’S kind of a marketing thing that this is a base coat gun really, but honestly, it will spray everything. I always suggest to you guys at home.
If you’re going to be into cars, get one good gun, you can use it for sealer base and clear, get a separate, cheaper gun for primer to set this up. I always like to back out this fluid control knob, just at a point where it’s almost going to come out when it’s on its last thread, pull in the actual trigger and then turn it clockwise again until it stops. Okay, once it stops, you’ll feel a little resistance on the trigger right there. At this point, we know this gun is set up at wide open, go ahead and take this fan move it all the way to the left. That means it’s set up at wide open at this point, so the gun is functioning now with maximum capabilities, and if it’s coming out a little bit too quick or we can always dial this in a little bit, this gun runs at a much lower pressure.
Around 5 15 psi, but on most of your spray guns, you’ll be spraying around 23 to 25 psi and we’ll chat real quick about the painting room. So basically we’re going to have some sort of exit. You need some sort of exit to pull the fumes out, but the way I like to paint is, I start from the back, so the overspray carries towards the exhaust towards the front and then when we go to start to re-coat from the back towards the front, We’Re just painting right over any of that dry overspray. That whey has a much smoother finish, and this is what we’re going to be doing when we’re, starting with our sealer our base and our clear coat. We’Re ready to paint we’re going to let Bodhi handle all the sealer, we’ll give you some tips and tricks along the way.
So let’s get this thing, all sealed up cool all right! We’Re going to start off here in the back test. Our pattern we’re good to go one light coat, is all you’re really gon na need guys you’re not going to need to put on let’s say two or three coats. You just want the car one basic color. You can go back to back in one pass.
If you want, but you’re not going to need to come back and put a whole separate coat on so you’ll allow this paint to dry for at least 15 to 20 minutes before we move to the next step. So the way that we want to do is we want to keep that wet Edge and by keeping that wet Edge, we’ll start on the side and we’re going to move all the way up across the roof, and what this does is it keeps a consistent, wet Edge and the wet Edge is what we’re seeing right here now when the sealer goes on. It goes on wet, that’s exactly what you want. If your sealer doesn’t go on wet, it’s not going to dry smooth so keep that nice wet sealer Edge coming and you’re going to have a nice smooth paint job so that first coat went down now. It could use a second coat and you see it’s a little bit light here.
All that really matters is that we got some sealer on there. It’S not really bad technique, it’s just that it would need one more coat to be completely covered, but as far as sealer is concerned, this will do, but it won’t hurt if you want to put one more coat on it, but we got the whole car in One color, but you want to allow this to really flash off and flash off means to dry in between coats and the dry in between coats. We’Re looking at maybe a good 15 to 20 minutes and you’ll see that in this area it’s kind of like dolish, but in some parts you’ll still see the reflection of the light you’re not going to want to see that glossy reflection you’re going to want to See it start to dull out and that’s a good visual aid indication that it’s ready for base coat. So in just a moment we’ll start to spray once it’s all flashed off and just like that. Our sealer is all dry and we’re ready for our base coat.
So our base coat we’re going to mix up two of them here now. This is a little bit different because it’s two to one. So all we did is low. Locate the two to one mixing ratio: we’re going to use the highest amount again, which is five, so we filled it up here and then we’ll fill it up to the next five with reducer. But we’ll show you how we filled it up on this one.
So Adam’s going to take this one over here, we’ll fill it up to the five just like that, and it’s going to be a little bit thicker until it’s completely reduced and it reduces two to one. So basically, fifty percent of this mix will be reducer and reducer helps the paint dry. It helps it come out of the actual gun itself and you can’t just use any reducer. You must use a reducer that comes with the actual paint and we’re using a slow reducer and a slow reducer basically is going to help the paint dry a little bit slower but smoother. So, if we’re using a faster or medium well, you’re gon na run into issues where your paint is just dry and orange peel and completely yucky all right, so Adam’s ready to put down the base coat now we’re going to spray it in the same fashion that We did for the sealer coat we’re going to start at the back at the hatch again working towards the front where the exhaust is and then he’ll start here at the bottom.
He’Ll, keep that wet Edge, they’ll move across the top and over to the other surface, keeping about a 75 to 80 percent overlap. The first coat might look a little splotchy, but no big deal because second and third we’ll go ahead and tie things up and get a nice solid finish and we’re starting off our base coat again with that dv1 base coat gun that we’re using for actual base Coat here and like I said earlier, you don’t need to get yourself concerned about buying a gun for every little thing, really, unless you’re, a professional, if you’re doing it yourself or at home, buy one good gun, it’ll spray, sealer base and clear a separate gun for Primer here, what Adam’s doing is he’s walking the whole vehicle? Now you don’t need to do this for a solid color, but this is the best practice for spring colors. You can see how even it goes on and trust me. This is a lot harder than what it looks like to stay consistent and even you want to follow around the 75 overlap, and that means that you are getting a good amount of coverage and 75 percent of what you just sprayed is getting overlapped once again.
So keep that nice consistency over the panel and keep that wet Edge and with that wet Edge is basically is. Is that edge of the product that you are spring so for this instance right at the edge of the red and where it meets the white? That is the wet Edge that you want to keep overlapping until you are done and by overlapping it you’re going to keep it nice and wet, because if you allow that edge to dry, it’s going to dry crusty. So that’s why we use that slow reducer to really keep things moving in order to get a nice smooth finish now, if you have a little bit of a rough finish in your base, you can always sand it with a 800 and just reapply again. This is me here just putting on a second coat.
We ended up putting on three coats, but just showing you here, two coats and it’s the same exact for all three coats, no need for any dust coat or anything like that with a solid color. Now we just finished laying down the third coat off camera, so we did a total of three coats and it was just the same as the first and second coat. Now, if you’re doing a solid, color, there’s absolutely no reason for any sort of dried coat or anything like that or Miss coat. I actually laid the third coat on wetter than most just so it would be nice and smooth. Now.
How long do you wait before you put clear on give it a good 30 minutes allow all of the solvents to come out of the paint, because if we trap them down with clear coat you’re going to see a little solvent Pops that are going to show Up so basically, this is what it looks like as of now, it’s nice and good to go and we’re going to apply the clear coat using the segola 4600 digital extreme, and this has the DVR clear air cap on it. This is an amazing gun and what I love most about it is it has the digital readout right there, so we’ll lay down two coats when we put the first coat on Bodhi will put the first coat on we’re not going to go extremely wet, but the Second coat much wetter now, when I do it, I’m going to break myself up into panels that way I can keep the most wet finish rather than walking it down. I like to walk out color, but when it comes to clear coat, I get a much better finish, just keeping it contained to our areas. At this point, we can go ahead and use our tack rag to go ahead and clean up the surface of the actual vehicle itself. A lot of people ask well how come you don’t attack?
Well, you don’t really need to if you don’t need to. If you have a clean environment and been using the tips and tricks in the article, then you’re gon na have a much nicer finish. So there are clear we’re going to mix it up four to one. That is how it gets mixed up for this particular clear coat. I noticed that four to one clear coats are touch thicker than most clear coats, so they might be a little bit more difficult to spray, but they actually build up really nice.
That’S actually really crystal clear: some clears are run a little bit yellow and they can change the color if you’re doing any sort of blending. But I really like the look of that all right four to one so putting it up to that next. Five and that’s good mix, this up start laying it down. So it’s time to get your project clear now on your first coat. This is what I want you to do.
I want you to take it easy. I don’t want you to go for full clear, and I also don’t want you to get upset or discouraged when it doesn’t come out beautiful on that first coat. What we have here body doing is just putting down a coat kind of a grip, a semi wet coat. That’S just going to allow the second coat to really bite down into it. You never want to get any sort of runs or sags, especially on the first coat makes it much more difficult to get it out.
So let’s just connect the dots, let’s get the clear coat on the panel and let’s get in the rhythm of painting. So when we get to that second coat, we know what we need to do now. One thing I never want you to do either is stop on a door handle or an edge Gap, make sure you extend that clear, at least five to six inches past any Edge Gap. The reason being is that the paint really has nowhere to go. So it’s just going to naturally build up on those edges and cause a run like scenario where it’s going to be really thick.
So we don’t want that so carrying along making sure that we’re keeping that wet Edge, nice and crispy, which is the most important thing. When spraying clear coat your wet Edge when spraying clear coat is more important than any wet Edge in any other material. The reason being is clear, coat dries much quicker and it’s going to show you if it’s not glossy, so it’s a little bit difficult. So we started towards the back of the car and then moving up and over the roof and back to the other side to keep that wet Edge going. But then you got to jump around towards the front and then kind of connect.
All the dots. Now, on the first coat not a huge deal, but on the second coat, where you’re just going to leave it and you’re not going to have a chance to replenish yourself or go over it again. Well, that’s when it’s a little bit more important when I go to spray. The second coat I’ll get a little bit more in depth about why and what you can do to help that out. All right and Bodie laid down that first coat and he did a phenomenal job like we were saying of putting down the first coat, not too wet and not being concerned with a little bit of dirt with a little bit of orange peel here and there we Need this tack coat, especially when spraying in a home garage, so we put down that second coat I’ll go ahead and I’ll lay it down a little bit thicker, because we already have that original coat.
That’S there and it’s just ready to grab it, but give this time don’t put it on your clear coat right away, help what you can and how we’re going to help it we’re going to give it 15 minutes before the next coat. Let the paint breathe a little bit and then we’ll lay it down now. I said it before, and I like to reiterate that you must give that first coat enough time to flash off. If you don’t give it enough time to flash off. This second coat will not do itself any justice and it will not operate the way it should by sticking and gluing itself to the surface.
Do you see how much slower and heavier I’m going, I’m actually using like an 85 percent overlap and what I need is for that original first coat to really help and grab this second coat. If I were to apply that first coat like I am applying the second coat, it would have runs everywhere. So just remember that again in the first coat, if it doesn’t look the way you want just take a step back and then on the second coat, you can fix things now. I never really recommend three coats, but if you’re going to put three coats on, you need to double up your wait time. So let’s say you waited 15 minutes between the first and the second coat.
I want you to double up that now to 30 minutes before that last coat. Reason being, is you have so much material that you have sprayed and that just needs time to gas out and if you were to trap it with a third coat? Well, that’s just gon na cause die back and a lot of issues with your paint that you just don’t want. So I only recommend two coats, but if you feel like you got some areas that have some texture or if you want to smooth it out even more because you got some dirt, then you can do that. Just give it a little bit more time now.
One other tip that you can use on your second coat is adding 10 reducer to the whole mix, slow, reducer, that’s going to help loosen things up. You can see here, I’m finishing on the driver’s side, but then I’m gon na have to go towards the front of that hood and I’ll. Show you what I do with the front of the hood and where I start because remember that I applied the clear coat up to the door on the passenger side and that’s been drying and if I don’t get clear coat on that area soon. Well, when I go to spray this clear coat, it’s going to land dry, I need it to land in like an ocean like a big puddle of wet, clear coats so to speak. That is what I need and if it’s kicking already, then that’s going to be a big problem for me, so it’s always important to use those slow activators, hardeners and reducers to keep that paint open as much as you can.
You can see here, as I’m finishing up on the driver’s side, I’m going to go over and kick it on to the passenger side and pick up before that paint really starts to dry, so I’ve just finished here on the fender and the top of the door. Let me come over to that passenger side right now and let me get some paint applied to it, because my driver’s I just sprayed it’s still gon na give me a few minutes before that starts to kick over so now I’ll apply my paint from the passenger Side and connect the dots back over towards the driver side, and it’s just the little things that you need to know when you’re spraying a car that make all of the difference, because if you had not done it this way you would have dry spots everywhere. So now, as I’m making my way across the hood, I’m really laying it down and I’m putting it 90 overlap on your horizontal surfaces. You can really get away with laying it out because it will naturally flow without running as easily. So keep that in mind on your horizontal surfaces, you can put a little bit more clear on there because you’re getting a lot more dirt and dust, that’s going to fall in there and actually give you a little bit more material to buff out.
So, as I finish up over here on the driver’s side, I’m not worried about my clear coat Landing in a dry desert. It’S going to land in a big Bountiful ocean of clear coat and it’s going to melt right in and I’m not concerned at all, because I’ve used a little bit of reducer to help and I use a slow activators in my hardeners and I know I’m good Wow, well, we did it. We put down two beautiful coats of clear. This is 30 minutes after and I’ve got to say this thing looks stunning for not even being in a booth now. Is it perfect, no you’re not going to find a perfect paint job even in a paint booth, but it looks really good and we’ve really minimized any sort of buffing that we’ll need to do so if you get any dirt in the paint like there’s a few Dust specs in this area.
Let me go ahead and sand those down and buff it, and I’ve got many articles on how to do that as well. But a big question that you guys always have is: when do I start taking the tape off I’ll? Tell you right now, if you have any areas that are bridge that are next to paint, we can go ahead and take those off pretty soon within at least 10 to 15 minutes. But if you have any areas that aren’t bridged and you’re concerned that they could possibly stick to the panel itself, then after 30 minutes, that’s where we’re at right now all we’re going to gently do is just lift up on any of those areas. So they don’t really glue themselves together and we’re going to have a nice finish at all of our edges.
And at this point now, we’ve kind of went around and we’ll continue to go around and take off anywhere where it’s bridged together. But we want to leave it now for a good two hours give yourself some time before you completely take it off now over in here this area. Now you could go ahead and remove that now, but it does not need to be done because it’s back mask when something is back masked when you’re using a reverse side of the tape, it’s going to be much more forgiving, so give everything about a good couple Hours and then we’ll come in here, we’ll unmask the whole thing together and we’ll reveal how awesome this looks after we pull it outside there. She is guys we did a phenomenal job and you can too do the same type of job in your home garage or wherever you might be, painting using the tips and tricks and procedures that we use in this. article will give you the same exact results and I got ta say man.
Look how vibrant, how beautiful, how red this looks outside just two coats of clear is all you need for something like this. You don’t need to add three or four. The high solids clears or clears nowadays they just don’t require it from this point, all they will be needed is a little buff on the hood and a roof to get this thing even smoother, to take out any debris from painting and anything other than a spray. Boot but guys we showed you today how to get awesome results in a regular spray room or room itself or garage, and here they are right in front of you. What do you guys think?
Let us know in the comments? What do you think of this paint? Job, let me know if there’s anything you would have done differently or, if there’s something that you learned from this actual paint job itself that you’re going to apply on your next project. I would love to know exactly what it is, but take a look at it from start to finish. You see the consistency of the color, because all the panels were sealed originally and remember.
If you’re not going to seal just make sure all your panels are one uniform color to make sure when you pull it out for the first time, everything consistently matches. Awesome awesome really really happy to work on such an iconic car and to work with body fission to bring you this amazing article brother. We did it man thanks again so much for inviting me over. I love making this content. We really showed the viewers at home.
How you can do something like this in your own home, set up your own home garage, so make sure once again that you’re, following body Vision on his channel a lot of Awesome articles just like this, and we look forward to being back up here to create A more amazing content as well brother, we knocked it out of the park. I’Ll see you sunglasses. This thing is, it is bright, yeah guys this is Brian from page inside of reminding you don’t overthink it. It’s just paint I’ll see you guys on the next episode.